<arjen@andromeda.nl>July 24, 2002
| Document Information | |
|---|---|
| Version | 0.2 |
| Organization | Andromeda Technology & Automation |
Abstract:
The Andromeda X-Windows Encapsulation (AXE) is a C++ class library which encapsulates the X Windows library (Xlib). Classical programming with Xlib is rather cumbersome to say the least. The Xlib calls are rather complicated and often require many parameters that can more easily be stored in objects. Also, the classical event loop present in most X applications is something you don't want to reinvent every time. That sort of thing is better left to a framework which provides you with more easy way to deal with events from the X server.
The intention of AXE is to make programming for X a lot easier. It was first developed to teach programming in C++ to students and let them do some graphics without being confronted by the X library. Over the past years it has grown into a framwork that not only encapsulates the resources in the X server, like windows, colors and graphic context, but provides some mechanisms that handle low-level communication with the X server, user interface classes, multithreading and utility classes. Although functionality of AXE overlaps with some other user interface libraries such as gtk+ or Qt, the first goal of AXE is not to be a user interface library. Some of the design goals in AXE are not met yet, but they include features such as dynamically loading of the user interface, a strong set of graphical object functions, image processing, high-level graphics objects and lots more.
To get you started with AXE, this tutorial takes you through a sample application in which some the features of AXE are touched upon. The sample application is a doodle program, where the user can freely draw pictures with the mouse. The pictures are stored as simple polylines with a few attributes. Writing the doodle program will show you how to build an AXE application and create the most basic functions for an application. In this tutorial, I assume you have sucessfully downloaded and installed AXE.
In this chapter we'll start writing the very minimum to get an AXE application going. All we do is make a top-level window, draw something in that window and add a button to quit the application.
Assuming you installed AXE, you can start creating the
doodle program.
The first thing you need in each and every AXE application
is to create an application class, derived from the class
xapplication and declare a static object of that class.
In the example below, our application class is called doodle
and the static object is DoodleApp:
#include <AXE/xappl.h>

class doodle: public xapplication
{
};

doodle DoodleApp;
Note that you need to include the header file AXE/xappl.h
which contains the definition of the xapplication class.
Also note that, other than in classical C or C++ programs, you do not
have a main() function.
This is taken care of by the AXE library.
Next, compile and link the application:
g++ -c doodle1.cpp
g++ -o doodle1 doodle1.o -lAXE -L/usr/X11R6/lib -lX11 -lXpm
Start the doodle program and you'll see that nothing happes. All this program does is connect to the X server and wait for events that will never come. To do someting visible, we have to create a window and map in on the screen. The
main() function in AXE calls virtual
functions in the static application object, which you can override
in your own application class to get some useful work done.
One of the first functions it calls after makeing the connection with
the X display is SetupResources.
We will now override this function and create a top-level window for
doodle (see demos/doodle1.cpp):
#include <AXE/xappl.h>

class doodle: public xapplication
{
   managed_window *main_frame;

   virtual void SetupResources(void);
};

doodle DoodleApp;

void doodle::SetupResources()
{
   main_frame = new managed_window("Doodling with AXE");
   main_frame->Map();
}
We added two items to our doodle class:
managed_window pointer to our top-level window:
main_frame
SetupResources()
SetupResources() function, we create the actual
window as a managed_window object.
A managed_window is a window like any other window, except
that is a direct child of the server's root window and as such is
managed by the window manager.
The window manager will put all kinds of decorations on our top-level
window like a title bar, a close button, a menu button, a border for
resizing and that sort of stuff.
Your mileage may vary, depending on the window manager you use.
We pass the title of our application to the constructor of the
managed_window, so we'll know what window we're looking at:
main_frame = new managed_window("Doodling with AXE");
The window is created but is not visible yet.
To show the window on the screen, we have to Map the
window with the member function Map().
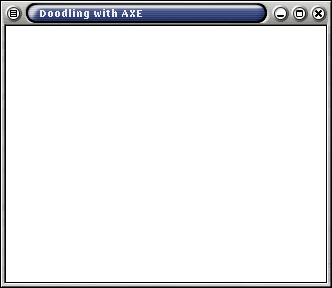
When you start the program, it will show the empty window with our
'Doodling with AXE' title in the titlebar:
For drawing graphics in X Windows, we need two things.
First of all the window to draw in, of course. Second, we need a
Graphics Context.
A graphics context is a resource in X Windows that defines how graphical
primitives are drawn. It holds all the properties such as backround and
foreground color, line size and dashing, the font for text strings and
much more.
The window part of drawing is easy.
We just created a window for doodle and all graphical drawing functions
are simply member functions of the window class.
The graphics context is encapsulated with the gc class.
For our first example we will create a gc object with a foreground
color of black.
This means that everything we draw in the window is black on a white background
(assuming the default background of the window is white).
To start drawing graphics, we add two lines to our SetupResources()
member funtion:
   gc    graphic("black");
   main_frame->DrawRectangle(graphic, 50, 70, 200, 100);
The parameters to DrawRectangle() are: the graphics context, the X and
Y coordinates of the top left corner and the size (width and height) of the rectangle.
So, this example draws a rectangle that has a top left corner 50 pixels to the right
of the left side of our window and 70 pixels down from the top side of our window.
The rectangle is 200 pixels wide and 100 pixels high.
Getting a picture in a window is not so hard in itself.
However, drawing once and immediately after creating the window is not enough
in any practical application.
Try some window operations on your fresh drawing after doodle puts the window
on the screen.
You can resize the window or move windows from other applications over the doodle
window and you'll see the rectangle disappear just as easily as you created it.
That is because the X server does not remember what you drew in the window.
At the moment you call the DrawRectangle() function, the X server
renders the pixels to make the area on the screen look like a rectangle and then
immediately forgets the request to draw the rectangle.
When the doodle window becomes visible again after having been obscured for a while
or when the contents of the window are supposed to change for any other reason,
all the X server can do is clear the area of the window.
It is left to the application to redraw the contents of the window.
Fortunately, the X server lets you know when somthing interesting happens to
your windows and when you are supposed to react.
It does this by sending events to the application that owns
the window where the event takes place.
The X server sends lots of events for all sorts of reasons.
Events are sent to your application for example when the user clicks a mouse button,
moves the mouse, hits a key on the keyboard or makes parts of your
window visible.
For each type of event, there is a virtual function in the window class.
If you want to handle any of those events from the X server, you have to
override an event handling function in a class you derive from the window
base class.
In our doodle application, we will make a new class and a new window.
The new window is created as a child window of our top level window and we will
draw pictures only in this child window.
Generally, it is not a good idea to do all kinds of drawing in the top level
window.
Any real application uses many windows for various kinds of user interaction
and the top level window is used only to organize all these sub windows and
interact with the window manager.
So, here we go with our own class derived from window, which we will
call a doodle_view:
class doodle_view : public window
{
public:

   doodle_view(window *parent) : window (*parent, 10, 30, 300, 220)
   {
      SelectInput(ExposureMask, 1);
      Background(color("lightyellow"));
   }

   virtual int EV_Expose(XExposeEvent);
};
We define two member functions for our doodle_view class: The contructor
function doodle_view() and the overridden event handler for
Expose events, EV_Expose().
In the constructor, we pass the parent window to the contructor of the base class,
window and add the default geometry of our subwindow.
The geometry for a subwindow is very similar to drawing a rectangle.
The four numbers are the X and Y coordinate of the top left corner, the width
and the height of the subwindow, relative to the parent window.
Inside the contructor, we tell AXE that we want to handle
Expose events by calling SelectInput().
The first parameter of SelectInput() is a bitmask of the events
we want to select.
The binary values and their names for the mask are the same as the ones defined
for the X library.
The second parameter is a boolean value which is '1' if you want to turn selection
of the events on and '0' of you want these events to be turned off.
We also add a little color to the subwindow, so it stands out more clearly
in the parent window.
The parent window specifies in which window we want to put our subwindow.
In doodle, we create the subwindow as a child of the top level window we created earlier.
A pointer to the subwindow is created inside the doodle class:
class doodle: public xapplication
{
   managed_window *main_frame;
   doodle_view    *draw_frame;
The actual creation of the subwindow is put in the SetupResources()
member funtion of the doodle class, right after the creation
of the top level window:
void doodle::SetupResources()
{
   main_frame = new managed_window("Doodling with AXE");
   main_frame->Map();

   draw_frame = new doodle_view(main_frame);
   draw_frame->Map();
}
Note that we have to Map the subwindow, just like the top level
window to make it visible.
Finally, we have to implement the event handler function of the Expose
event handler, EV_Expose().
As you may have noticed, the DrawRectangle() is removed from the
SetupResources() function.
We now wait for an expose event from the X server to do the actual drawing.
Every time our window becomes 'exposed' the X server sends an Expose
event, to which we react by redrawing our rectangle in the window.
Here is the implementation of the Expose event handler:
int doodle_view::EV_Expose(XExposeEvent ev)
{
   gc    graphic("black");

   DrawRectangle(graphic, 50, 70, 200, 100);

   return 1;
}
Here you see the gc object and the DrawRectangle()
again, nearly the same as we previously had in the SetupResources()
function of the doodle class.
There is one difference: The pointer to the window (main_frame->
in our previous example) is removed from the function call.
This is because we are now inside a member funtion of the doodle_view
class and our window is passed implicitly as the this pointer
of the object itself.
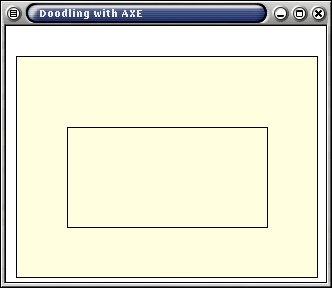
The complete source code of the second doodle example is in the file demos/doodle2.cpp of the AXE distribution. If you compile and run doodle2, it should look like this:
Up until now, we do not have a decent way to quit the doodle application. You have to kill doodle by sending it a signal, like hitting ctrl-C on your keyboard. It's about time to remedy that situation. There are many ways to close an application, like hitting a specific key ('q' for quit might be a good one), clicking on the close button provided by the window manager or providing a 'Quit' button or menu item in the application itself. We will explore all of these possibilities in later chapters. For now, to keep things simple, we will use the keyboard to quit doodle.
When the user hits a key while the focus is on the doodle window, the X server
sends a KeyPress event to our application.
This KeyPress event is dispatched by AXE to the
window on which the key was pressed, just as Expose events are
dispatched to the appropriate window.
In AXE, you can use any event to quit your application program.
All you need to do is return the value 0 (zero) from the event handler function.
You may have noticed in the previous section that the EV_Expose()
handler function returned the value 1 (one).
This return value tells the AXE library not the quit the program
after the event is handled.
If you return 0 (zero) from an event handler function, AXE will
destroy all your windows, close the display connection with the X server
and quit the application.
So, to quit doodle on a key stroke, we select KeyPress events
next to Expose events in our subwindow and override the
EV_KeyPress() event handler function.
To select KeyPress events, we add another SelectInput()
in our doodle_view contructor:
   doodle_view(window *parent) : window (*parent, 10, 30, 300, 220)
   {
      SelectInput(ExposureMask, 1);
      SelectInput(KeyPressMask, 1);
      Background(color("lightyellow"));
   }
Next, also in the doodle_view class declaration, we add the
declaration of the member function to handle the KeyPress events:
virtual int EV_KeyPress(XKeyEvent ev);The implementation of the event handler is very trivial. Just return the value 0 (zero) and doodle will close down when any key is pressed in the light yellow window:
int doodle_view::EV_KeyPress(XKeyEvent ev)
{
   return 0;
}
Having any key at all, even the Ctrl or the CapsLock key, quit doodle is a bit
cruel, don;t you think.
So, let's restrain the quitting to just the lower case 'q' key.
When we get an event from the X server in one of our event handling functions,
all kinds of information about that event is passed in the ev
parameter.
Until now, we silently ignored the ev parameter but is this
case we need it to find out which key was actually pressed.
There is no special provision in AXE to do this.
There are Xlib functions that do the job just fine.
The one Xlib function we use here is XLookupKeysym(), which extracts
information from the XKeyEvent structure and returns
a standardized code (a KeySym) of the key that was actually pressed.
For most 'ordinary' keys, the KeySym value is the same as the ASCII
value.
We can use the 'q' key simply by checking the KeySym for the
value 'q':
int doodle_view::EV_KeyPress(XKeyEvent ev)
{
   KeySym   key;

   key = XLookupKeysym(&ev, ev.state & 1);

   if (key == 'q')
   {
      return 0;
   }
   else
   {
      return 1;
   }
}
With this extra check, you can hit any key you want on doodle, but
only the 'q' key makes doodle leave the desktop.
You can find the complete source of this example in demos/doodle3.cpp.